How to make a snowman paper snowflake
I’ve been cutting snowman paper snowflakes for at least 20 years. It’s one of my greatest party tricks, and by “party” I mean family Thanksgiving, and by “tricks” I mean things I like to do before and after eating pie. But really, it’s a big hit with the kids (and the adults!). I’ve tried working it into real parties, but it’s hard to find a hole punch at someone else’s house ;)
Aside from a few delicate cutting maneuvers, it’s pretty easy to cut a snowman paper snowflake. They almost always turn out cute and not maniacal. They’re pretty easy to envision, and they have very simple “parts” - hole punch eyes, circle or diamond buttons, triangle carrot nose, you get what I’m saying.
As I say with every paper snowflake, the important part is the folding. If you make nice crisp folds that line up, the cutting will be easier and you’ll have more predictable results (your snowman won’t turn out to be a cyclops).

1) Gather your supplies
1 piece of paper - the thinner the better
sharp scissors
hole punch - my favorite sizers are 1/16” or 1/8” (if you only have a 1/4” hole punch your snowman will just have BIG eyeballs)
a pencil if you’re the sketch-it-out-first type
(Check out my supplies page for recommendations on scissors & hole punches!)

2) Fold your paper snowflake
Check out my How to Fold a Paper Snowflake Like a Pro blog post for detailed step-by-step directions!

3) Trim off the excess paper
If you peek into your folded paper snowflake, you’ll see that one fold of paper is shorter than the others. Begin there and cut an arc across the paper toward the other side. You’ll end up with a pie shape that has a gentle arc.

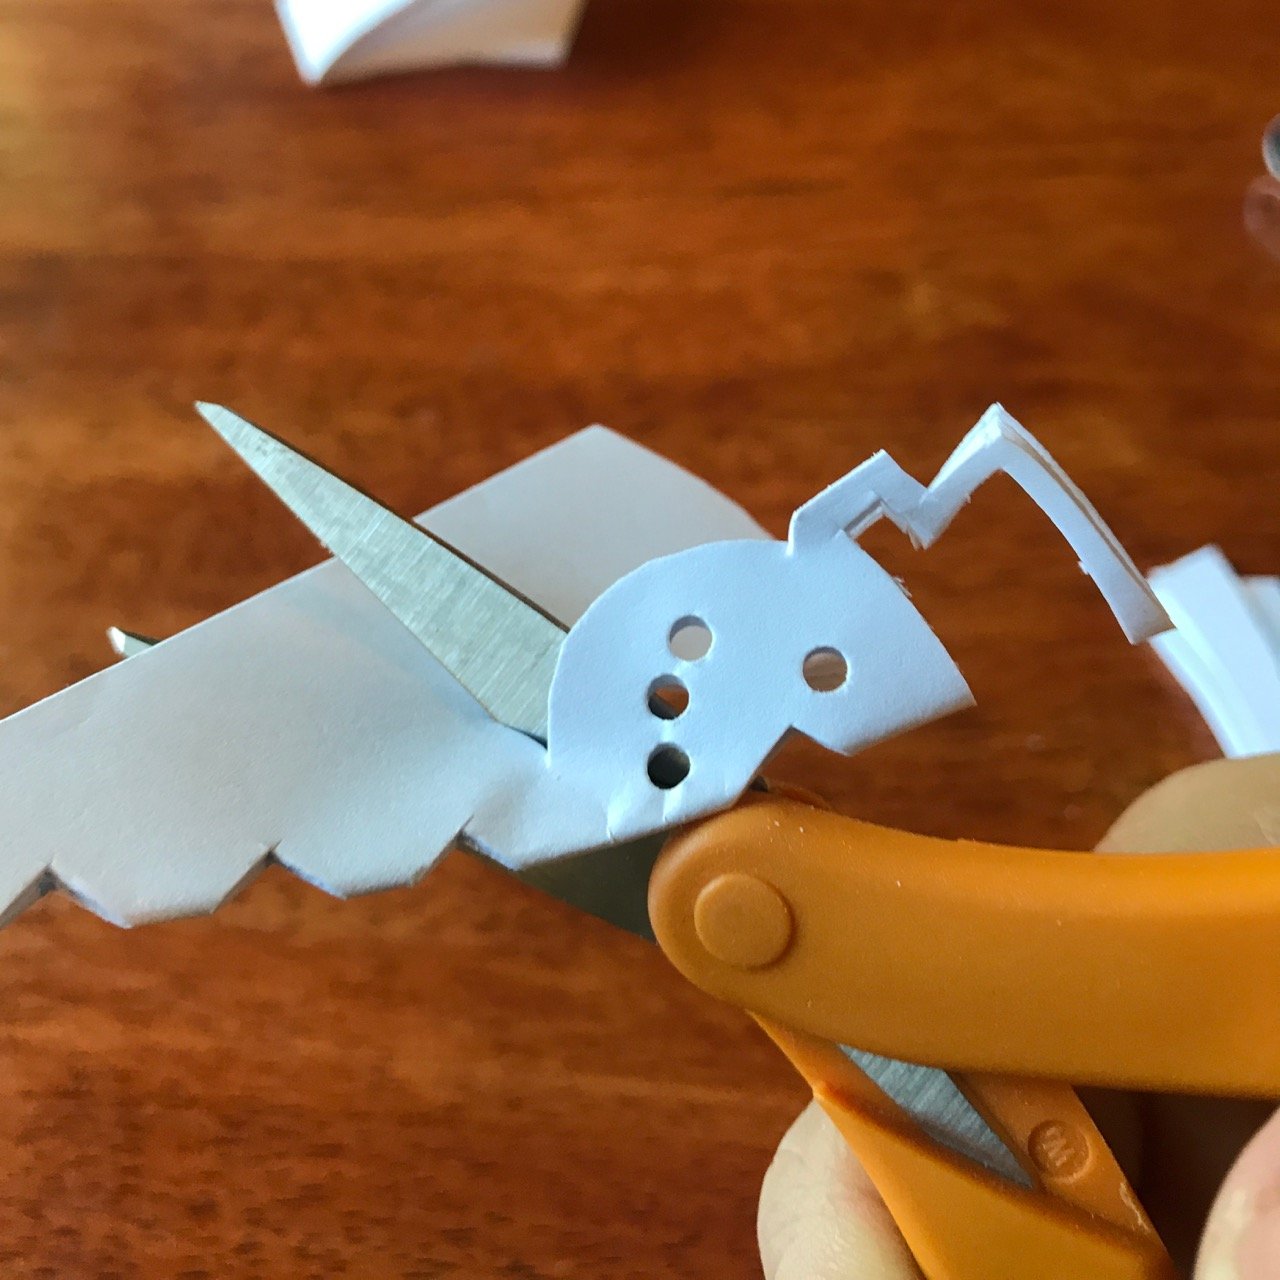
4) Add eyes and a mouth
Grab your hole punch and put on your imagination goggles. You are going to imagine a snowman along the big fold of your paper snowflake. To be more specific, you are going to imagine HALF of a snowman. Where would his eye be? That’s where I’d like you to make a hole punch. When you’ve finished that, try giving him a smile with the hole punch (leave a little room by the fold). If you don’t happen to have your imagination goggles with you, you can also just sketch 1/2 of a snowman on your paper with your pencil.

5) Add a hat & buttons
If you have enough room above your snowman’s head, try giving him a top hat with your sharp scissors. Under his smile, give him some buttons.
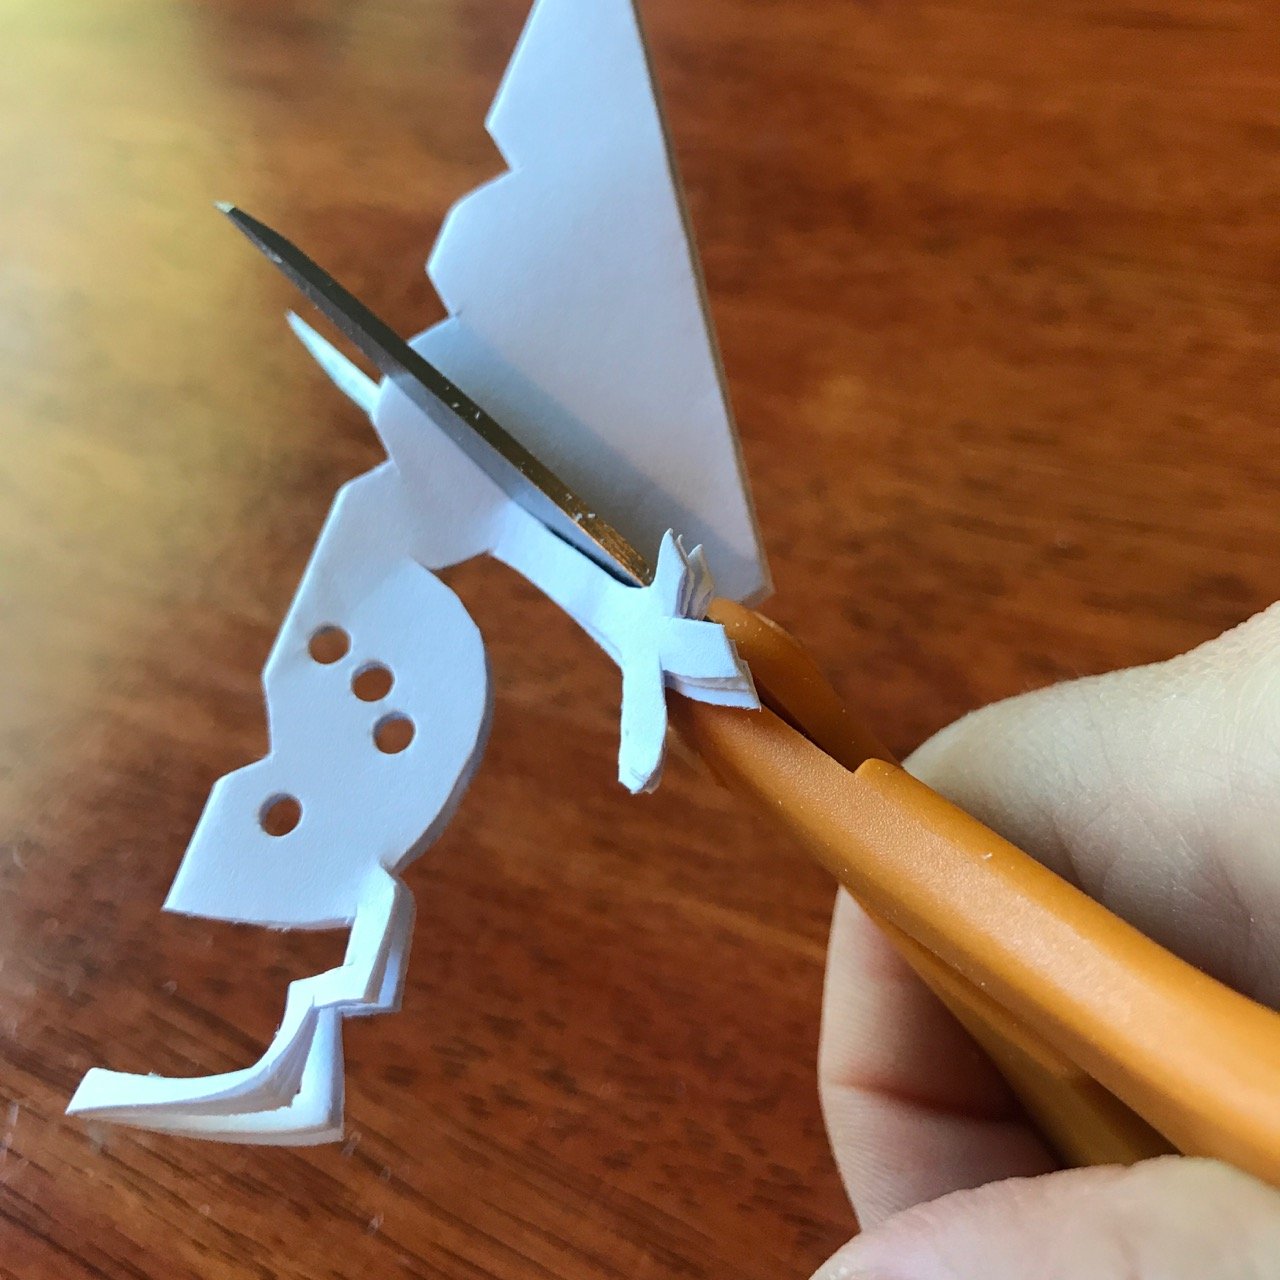
6) Edge the hat
Here comes the tricky part. Are you ready? Of course you are!
Use your scissors to trim off the excess paper above the top hat, around the snowman face, and down to where his neck would be.
Make sure you give yourself a good amount of room, and pay close attention to where your cuts are from your top hat. You don’t want to cut all the way through the border and give your snowman a flat head with no hat.
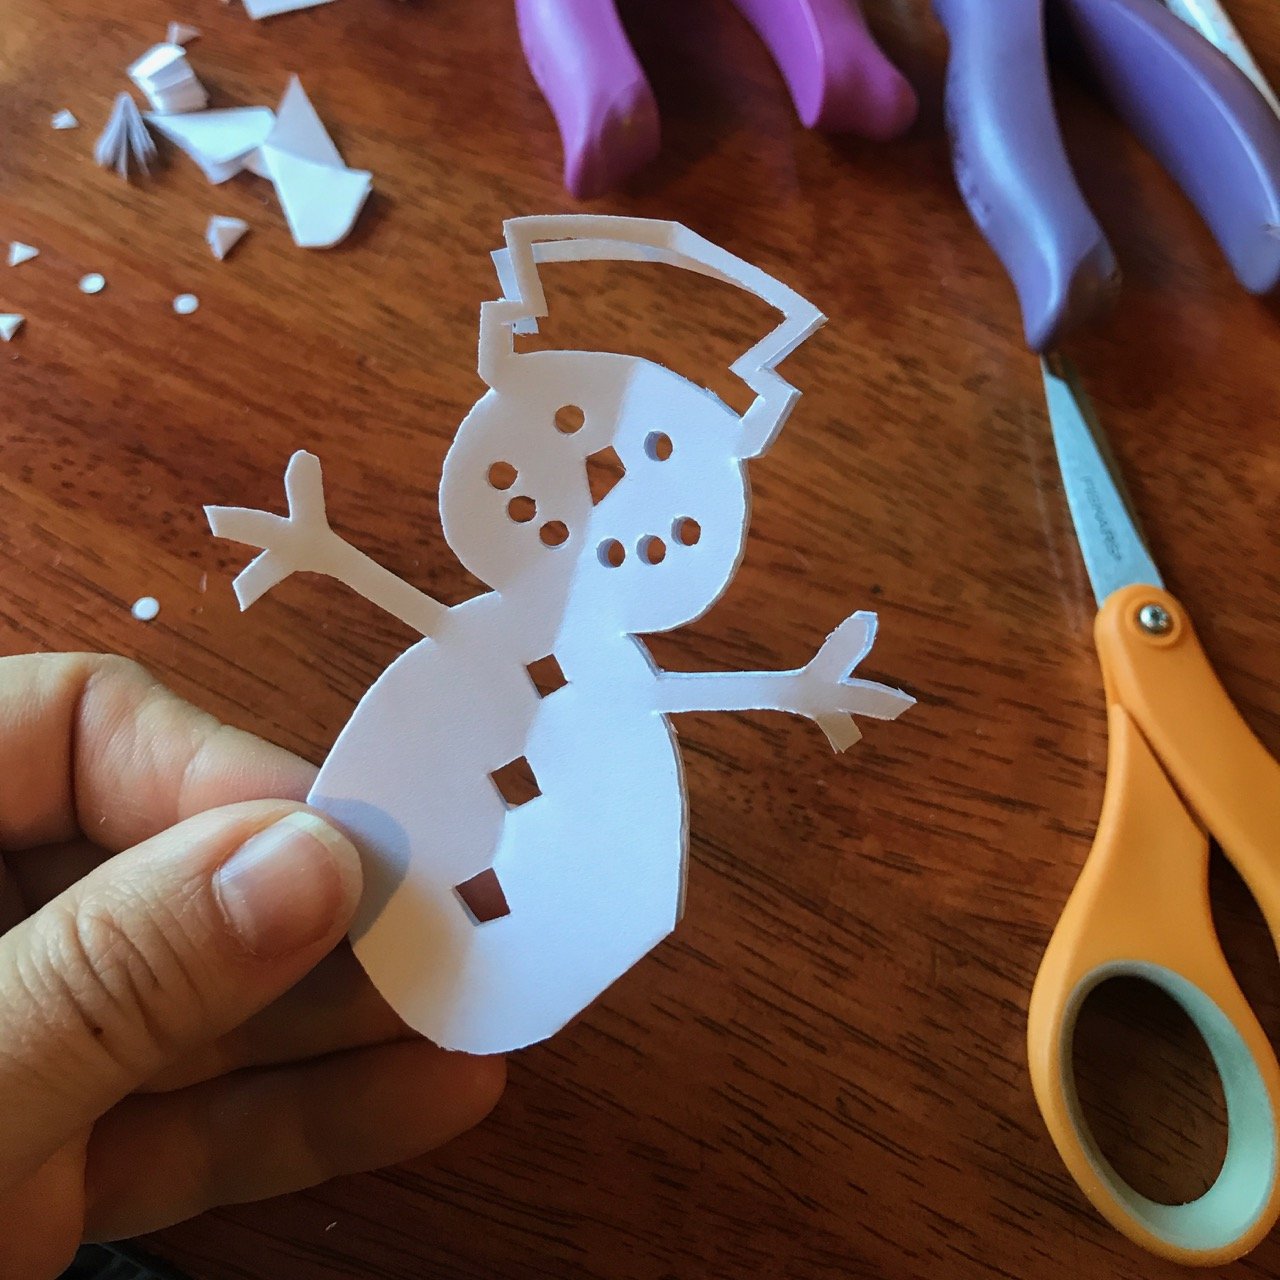
7) Add arms
Now comes the tricky part. What? Wasn’t the last part the tricky part? it was, but this part is trickiER so it’s time to focus.
With your non-cutting hand, pinch your snowflake paper really tight. You don’t want your layers sliding around for this next cut.
With your scissors, turn the corner of the snowman neck to start cutting his body. When you get about 1/2” down, you are going to turn your scissors sharply and cut a long stick arm. I like to give my snowmen 3 fingers, but I’m not sure why, so give yours as many fingers as you’d like! Or mittens! Your snowman’s arms should reach all the way over to the other fold.

8) Round out that snowman body
Now comes the tricky part. I’m just kidding, the hard part is over! Now you just need to round out that snowman body. Cut a little curve down from the snowman’s armpit back toward the fold. You need to keep some of the fold there to hold your snowflake together. Cut the tip of the snowflake off to show where the snowman’s body would end. How’s it look? Are you feeling confident? You should be!
9) Unfold your snowflake!
It’s time to unfold! Go slowly, and pay extra attention to the arms and the top hat. Sometimes paper sticks together and thinly cut areas will rip apart. How’s it look? Adorable right?
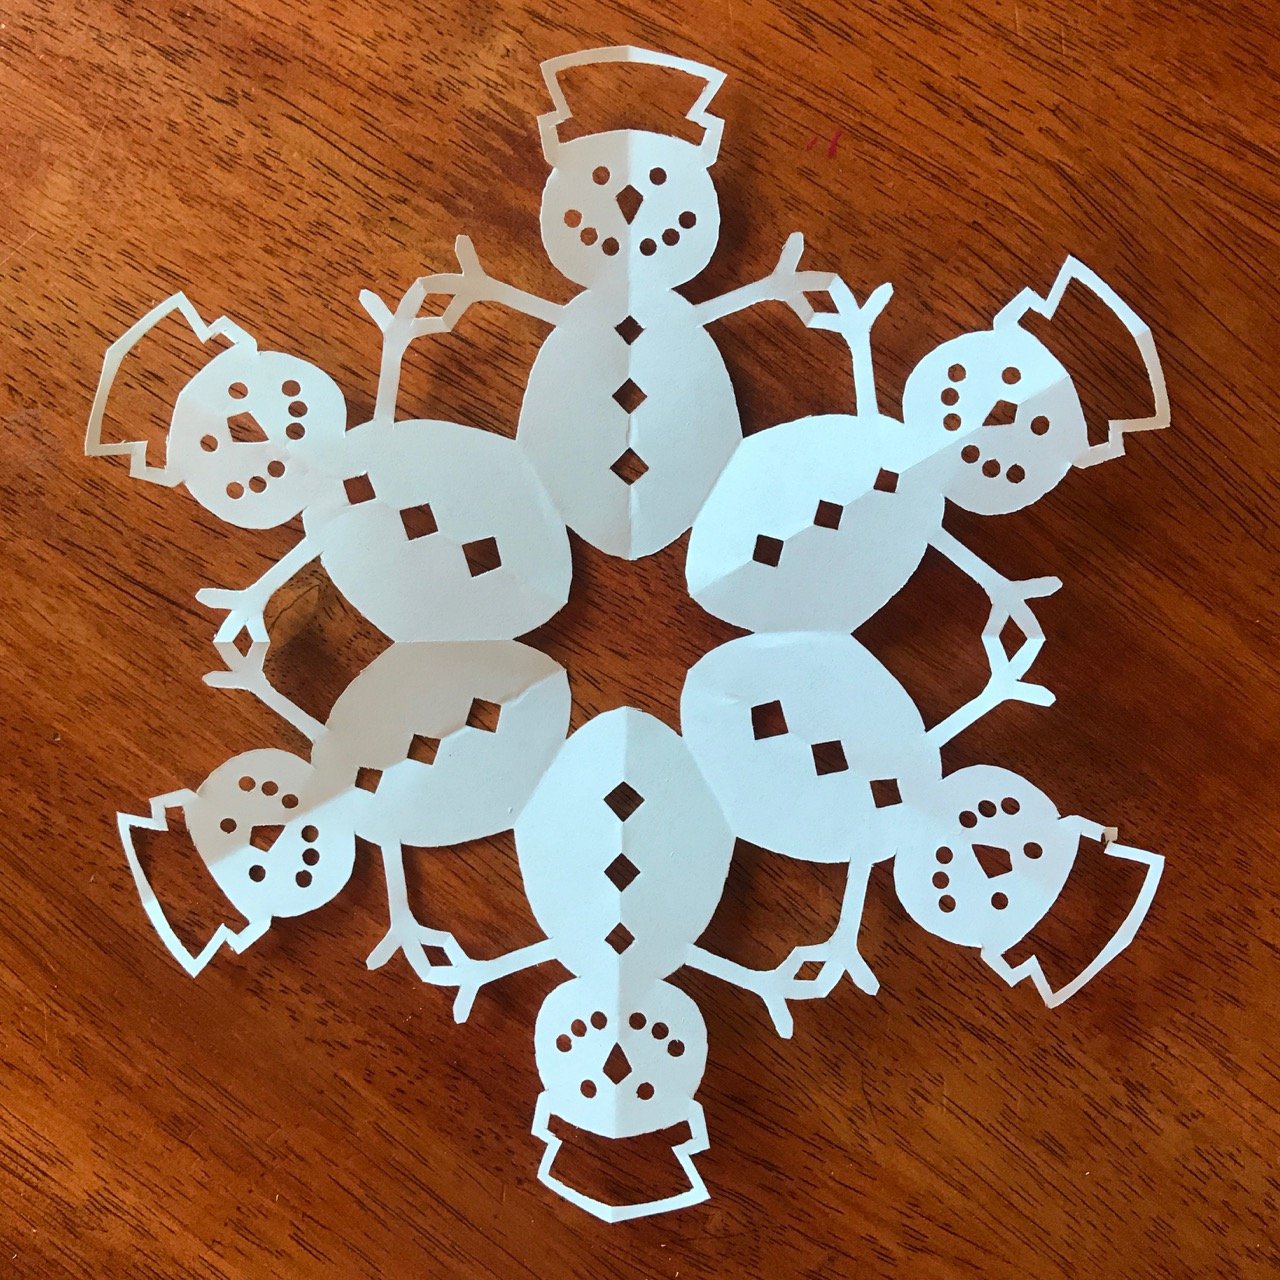
10) Flatten it out
I like to flatten my snowflakes inside of a book overnight to get them REALLY flat. Then they’re ready to glue to background paper, hang in the window, attach to a gift, sneak under someone’s windshield wiper, etc.

Even easier: download the snowman paper snowflake pattern!
If you want an even EASIER way to cut out a snowman paper snowflake, just use my snowman pattern, which is part of the Winter Paper Snowflakes Pattern Pack! You can print out the template, follow the instructions, and you’ll have a pattern to follow. Simply cut out the gray part of the template, and leave the white. Unfold & enjoy!